Neurostuff Development Environment
This post is a chronicle of how I’m setting up a development environment for neurostuff using VSCode (version 1.48.2 as of this writing).
Prerequisites
Step 0: clone the repository
clone the repository
git clone https://github.com/PsychoinformaticsLab/neurostuff.git
and then cd into the created folder.
cd neurostuff
Step 1: Open VSCode
open vscode
code .
Step 2: Generate the Container Files
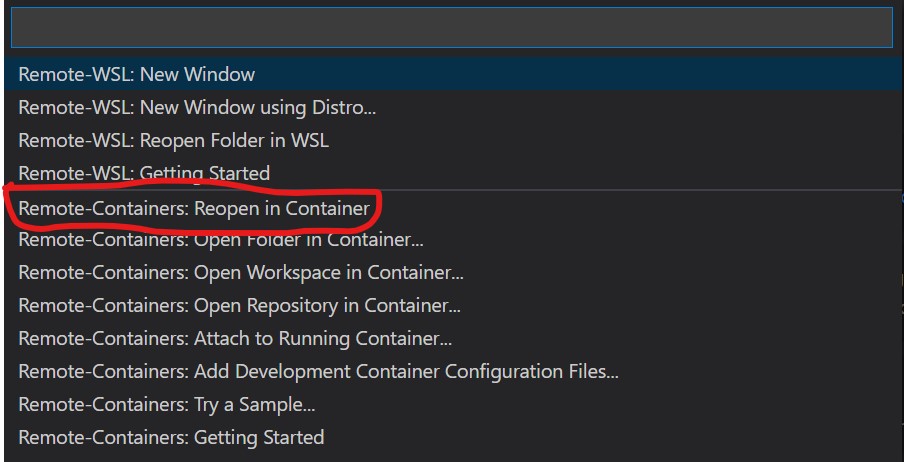
Click on the lower lefthand green section of the VSCode bottom banner.
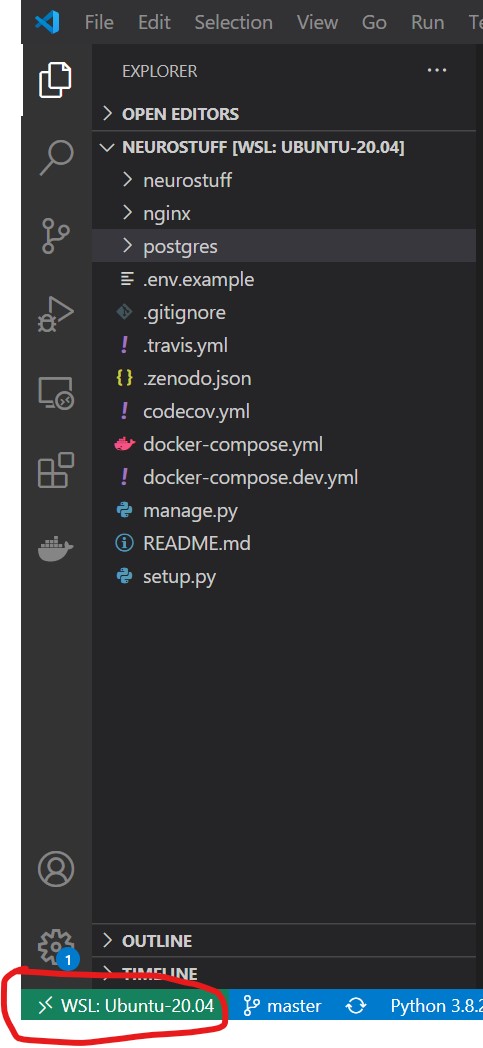
That will open a menu where you will select
Remote-Containers: Add Development Container Configuration Files...

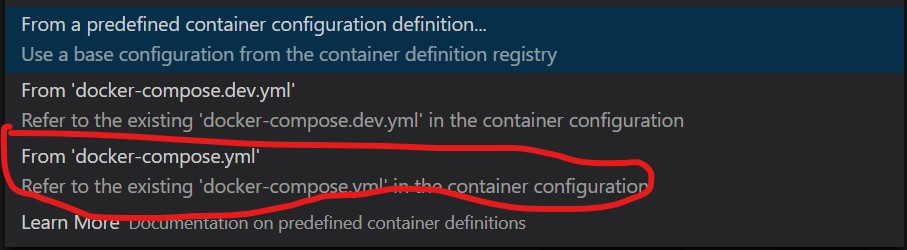
which progresses the menu to the next choice of which file
to use to build the container.
You will select From 'docker-compose.yml'.
The next menu will ask which service you wish to create,
you will select neurostuff.

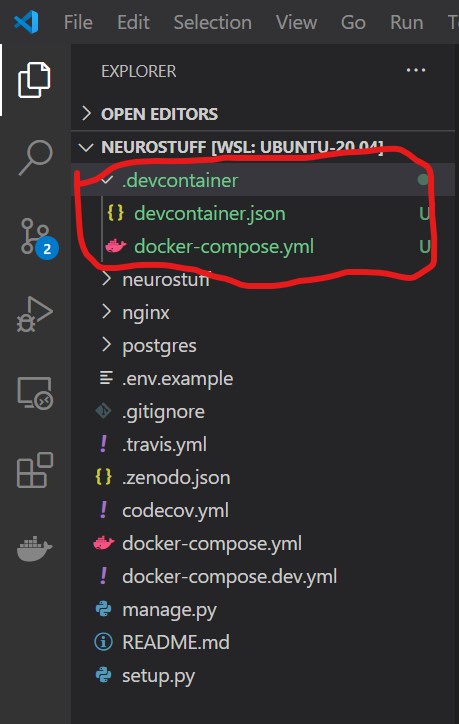
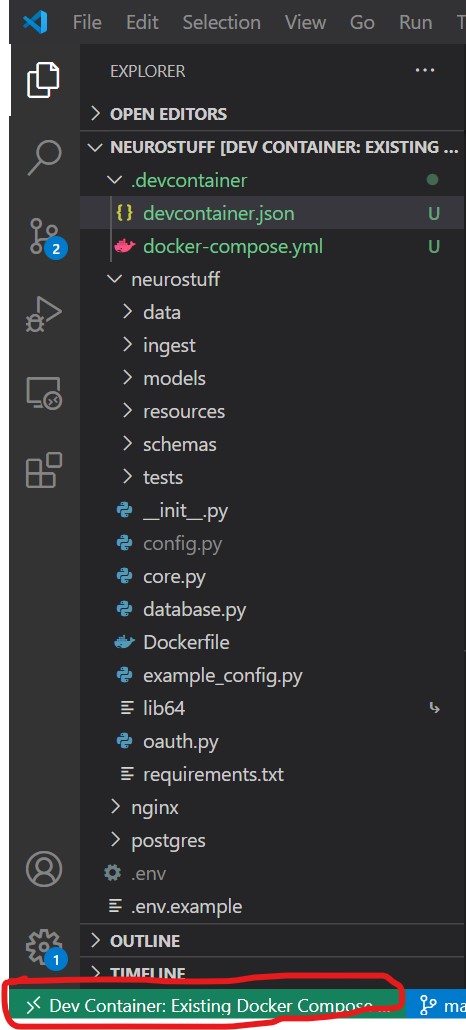
Following those choices should result in a folder named
.devcontainer with two files:
devcontainer.jsondocker-compose.yml
Step 2: Edit devcontainer.json
There are several edits needed to setup devcontainer.json
for the neurostuff repository.
The first field to edit in devcontainer.json is dockerComposeFile:

within neurostuff, there is an additional docker-compose.dev.yml
file to add.

The second field to edit in devcontainer.json is workspaceFolder,
which by default is /workspace.

Change /workspace to /neurostuff

Finally, the third field we want to edit is extensions.
neurostuff is written in python, so we want the python extension to
be installed with vscode on this remote container.
Add
ms-python.python to extensions`.

Step 3: Edit docker-compose.yml
Within docker-compose.yml we will change the
volumes mount from /workspace to /neurostuff

Step 4: Open VSCode with the remote container
Click on the left corner in the green section of the bottom banner again.
Select Remote-Containers: Reopen in Container
Once the images are built and the containers
are created, you should be working from within
the neurostuff container, yay!
Step 5: Setup python testing
Press Ctrl+Shift+P and type into the
menu bar: Python: Configure Tests

neurostuff uses pytest so we will select pytest as our test framework.

When the menu progresses, select neurostuff
as the base directory.

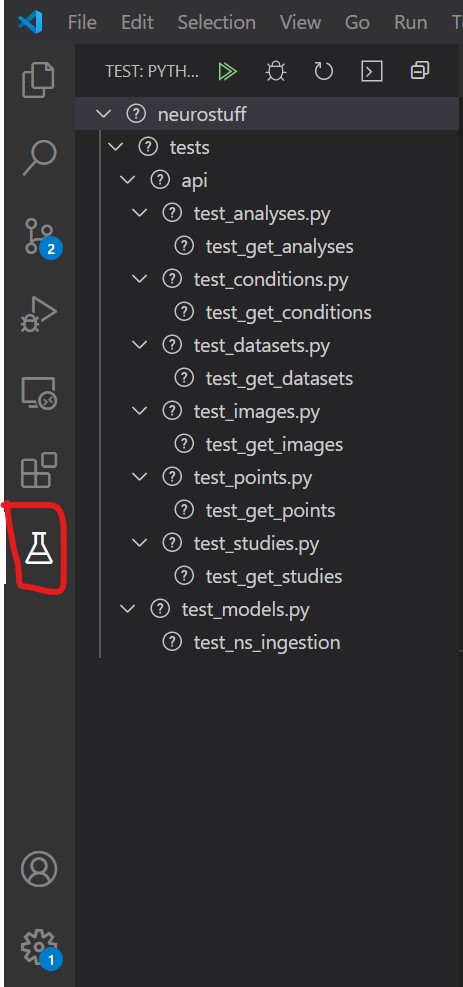
The menu should close and VSCode will find
all tests written for neurostuff and you
will see a new icon that looks like a beaker.
To try debugging a test, create a breakpoint in one of the test files.
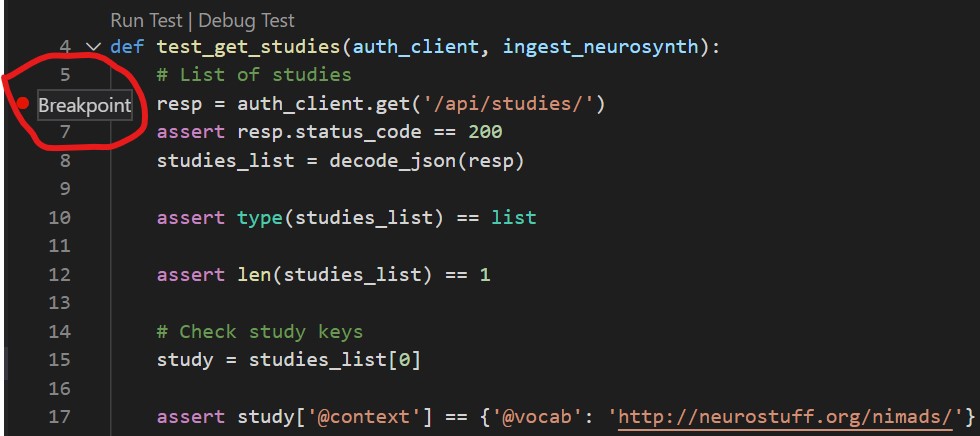
then click on Debug Test above the test function.

Clicking Debug Test should run the test until it reaches the breakpoint at which point
you have total control to inspect variables and test your understanding.
